

Understanding Garage Door Motor Installation
Overview of Garage Door Systems – Basics of garage door components and motor functions
In the symphony of home automation, the garage door motor serves as the heartbeat, pulsing with silent power that transforms mundane openings into effortless gestures. Understanding the intricacies of garage door systems reveals a delicate balance of components—springs, tracks, rollers—each playing a vital role in harmony. The motor itself is the conductor, orchestrating movement with precision and grace, yet behind this seamless operation lies a complex interplay of mechanics waiting to be unraveled.
For those eager to master this craft, a garage door motor installation video offers an invaluable window into the process. It illuminates the nuanced steps—mounting brackets, wiring connections, and calibration—bringing clarity where confusion once dwelled. As you watch, you’ll discover that the motor isn’t merely an engine but a vital nerve connecting safety, convenience, and modern living. In South Africa’s diverse landscape, ensuring this vital component operates flawlessly is an art and science intertwined, waiting to be explored through detailed visual guidance.
Importance of Proper Installation – Safety considerations and long-term benefits
In the intricate dance of modern home security and convenience, the importance of proper garage door motor installation cannot be overstated. When executed with precision, it transforms a simple mechanism into a reliable guardian of your space, safeguarding loved ones and assets alike. A well-installed motor is not merely about functionality but a testament to craftsmanship—an unspoken promise of safety and durability.
Watching a detailed garage door motor installation video reveals the delicate balance of mechanics and safety considerations that underpin this process. Every step, from mounting brackets to wiring connections, is a vital stroke in the symphony of seamless operation. Proper installation ensures long-term benefits, such as minimized wear and tear, reduced risk of malfunction, and peace of mind for years to come.
In South Africa’s diverse landscape, where fluctuating weather can test the resilience of home systems, precision in installation becomes an art form. Remember, the success of your garage door system hinges on the meticulous execution of each phase—making the garage door motor installation video an invaluable resource in this pursuit. Safety, after all, is the cornerstone upon which lasting convenience is built!
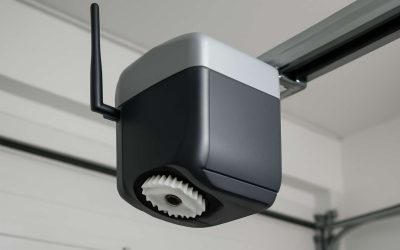
Common Types of Garage Door Motors – Chain drive, belt drive, screw drive, and their differences
Understanding the different types of garage door motors is essential for a flawless installation. Each type offers unique advantages suited to specific needs. The most common are chain drive, belt drive, and screw drive motors. When watching a garage door motor installation video, you’ll notice how each type requires a tailored approach.
Chain drive motors are renowned for their durability and strength. They use a metal chain to lift the door, making them ideal for heavy or frequently used garage doors. Belt drive motors, on the other hand, operate more quietly using a reinforced belt—perfect for homes in South Africa where noise reduction is valued. Screw drive motors feature a threaded steel screw that turns to raise and lower the door, offering simplicity and reliability.
Choosing the right motor involves understanding these differences. A garage door motor installation video can clarify these distinctions, ensuring you match the motor type to your specific needs. Proper selection and installation are crucial for long-term performance and safety, especially in South Africa’s diverse climate.
Preparing for Installation
Tools and Materials Needed – List of essential tools and parts
In the shadowed corridors of home maintenance, few tasks hold as much mystery and significance as the installation of a garage door motor. Before embarking on this journey into the unknown, preparation is paramount. A well-organized arsenal of tools and materials becomes your shield against chaos and misfortune. The garage door motor installation video offers a glimpse into this ritual, but understanding what lies beneath is crucial for mastery.
Gathering the essential tools and parts transforms the process into a symphony of precision rather than a descent into chaos. You will need a cordless drill, screwdrivers, wrenches, and a level—each a key to unlocking the secrets of proper installation. Additionally, ensure you have the correct garage door motor kit, safety gear, and mounting brackets. With these elements aligned, you’re ready to confront the shadows and bring light to your garage’s mechanical heart.
Safety Precautions – Safety gear and precaution tips
Embarking on the quest to install a garage door motor is akin to stepping into a realm of mechanical enchantment, where safety must remain your steadfast guardian. Before delving into the mysteries revealed by the garage door motor installation video, it’s vital to don the armor of proper safety precautions. Protective gear such as safety goggles, gloves, and steel-toed boots serve as your shield against unforeseen sparks or falling debris—a common hazard when working with hefty components. Remember, a single misstep can turn a routine task into a perilous ordeal.
To fortify your journey, follow these essential safety tips:
- Ensure the power supply is completely disconnected to prevent accidental activation of the motor.
- Use a sturdy ladder or scaffolding that can support your weight safely, avoiding unstable footing.
- Keep your workspace clear of clutter, and work in well-lit conditions to spot hazards before they strike.
Amidst this preparation, never underestimate the importance of patience and vigilance—elements as vital as the tools themselves. Watching a garage door motor installation video provides guidance, but your safety remains paramount as you bring the project to life in your South African home. With these precautions in place, you pave the path for a successful and secure installation that will stand the test of time and use.
Assessing Your Garage Space – Measuring and clearances required for installation
Embarking on the journey of garage door motor installation begins long before the first tool strikes metal. It’s a meticulous dance with space itself—assessing your garage to ensure it can accommodate the new motor and its mechanisms. A vital step is measuring the headroom and side clearances, which determines whether the motor and track system will fit comfortably without hindrance. In South Africa’s diverse architectural landscape, garage dimensions vary widely, making precise measurements all the more crucial.
Before watching a garage door motor installation video, take a moment to evaluate your space. Ensure there’s enough clearance for the door to open fully without obstruction. This involves checking the height from the floor to the ceiling, as well as the width of the opening. If your garage has limited space, consider alternative motor types that suit tighter environments. Remember, the success of the installation hinges on understanding these spatial parameters—skipping this step can turn a straightforward project into a frustrating obstacle course.
- Measure the height from the floor to the ceiling, ensuring enough room for the motor and its components.
- Check the width of your garage opening to confirm it aligns with the motor’s specifications.
- Verify the side clearances to allow for safe installation and future maintenance.
Assessing your garage space meticulously ensures that when you watch the garage door motor installation video, you’re prepared to translate the visual guidance into a precise and safe setup. This foundational step doesn’t just facilitate a smooth installation; it guarantees that your investment will operate reliably for years to come, seamlessly integrating into your South African home’s unique environment.
Step-by-Step Garage Door Motor Installation Process
Removing Old Motor and Components – Tips for safe removal and disposal
Removing an old garage door motor isn’t just about disconnecting wires and unscrewing brackets; it’s an act of liberation from a system that no longer serves your needs. In many cases, a faulty motor can compromise security and convenience, making its removal an essential first step in the garage door motor installation process. Watching a detailed garage door motor installation video reveals the importance of safety and precision—each step carefully orchestrated to prevent damage or injury.
Start by disconnecting power sources, ensuring all electrical hazards are neutralized. Carefully unbolt the motor from its mounting brackets—remember, patience and steady hands are your allies here. For safe disposal, consider recycling the old components or donating them if still operational. Proper removal not only paves the way for a seamless installation but also preserves the integrity of your garage structure, making the subsequent steps more straightforward.
Incorporating a garage door motor installation video provides invaluable visual guidance, illustrating how to execute each phase with confidence. Whether it’s lifting the old motor out or preparing the space for the new unit, this resource transforms a daunting task into a manageable project. The process underscores the importance of deliberate, careful work—every action echoing a commitment to safety and longevity in your garage system.
Installing the Mounting Bracket – How to position and secure the bracket
Positioning the mounting bracket correctly is crucial for a smooth garage door motor installation. A well-secured bracket ensures the motor operates efficiently and reduces strain on the system. Start by aligning the bracket with the marked points on the garage door frame, making sure it’s level and centered. Use a spirit level if necessary to achieve perfect alignment. Once in position, mark the screw holes for drilling. This step might seem trivial, but precision here prevents uneven operation or premature wear.
Next, secure the bracket with appropriate screws and anchors, ensuring it’s firmly attached to handle the motor’s weight and movement. For added stability, consider using longer screws or wall anchors if the structure requires it. Remember, the goal is to create a sturdy foundation for the motor, which significantly impacts the longevity of your garage door system. Watching a garage door motor installation video can provide visual clarity on these nuances, making the process more straightforward and less intimidating. Proper installation of the mounting bracket ultimately ensures your garage door operates quietly, safely, and reliably for years to come!
Assembling the Motor Unit – Connecting motor parts and wiring basics
Assembling the garage door motor unit is a pivotal step that can make or break the entire installation. After ensuring the mounting bracket is securely positioned, the next phase involves connecting the motor parts with precision. Watching a garage door motor installation video offers invaluable visual guidance, but understanding the core process deepens your confidence. Typically, the motor’s main body is attached to the mounting bracket, followed by connecting the drive mechanism—whether chain, belt, or screw—depending on your system’s type.
Wiring the motor correctly is equally critical. Here’s a quick glance at the sequence:
- Connect the motor’s power cable, ensuring the wires are insulated and secured.
- Link the control panel wires, following the color-coded instructions for safety and functionality.
- Attach the safety sensors, if applicable, to prevent accidents during operation.
For a seamless setup, many prefer to follow along with a comprehensive garage door motor installation video, which reveals subtle details like aligning components and securing wiring. Proper assembly not only ensures operational efficiency but also enhances the longevity of the garage door system, making every moment of the installation process count.
Mounting the Motor to the Bracket – Aligning and securing the motor unit
Securing the garage door motor to its mounting bracket is a critical step that often determines the success of your entire installation. Precision matters—misalignment can lead to operational issues or even damage the system. To get it right, lining up the motor unit carefully with the bracket ensures smooth functioning and reduces the need for adjustments later on.
Many installers find it helpful to watch a garage door motor installation video at this stage. These videos display subtle details like aligning the motor’s mounting holes and securing the unit firmly in place. Visual guidance simplifies the process, but understanding the core principles behind mounting guarantees a safer, more durable setup.
- Position the motor unit so that it aligns perfectly with the mounting bracket.
- Secure the motor using bolts or screws, tightening them evenly to prevent wobbling.
- Double-check the alignment to ensure the motor is square and stable before proceeding with wiring.
In many cases, a well-made garage door motor installation video can be a homeowner’s best friend—helping to clarify tricky steps and ensure every component is correctly mounted for long-lasting performance. Proper mounting isn’t just about safety; it’s about ensuring that the entire garage door system operates quietly and reliably for years to come.
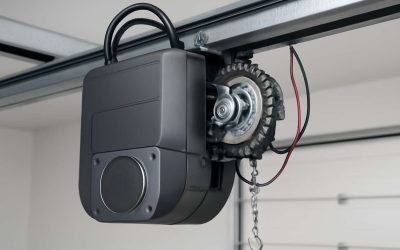
Connecting the Drive Mechanism – Installing belts, chains, or screw drives correctly
There’s an almost poetic elegance in connecting the drive mechanism to your garage door motor—each step a dance of precision and harmony. When installing belts, chains, or screw drives, it’s vital to ensure they are fitted correctly, for these components are the veins that carry life into your garage system. A well-executed installation guarantees not only smooth operation but also a quiet, dependable performance that stands the test of time.
Many find that watching a garage door motor installation video transforms a daunting task into a manageable, almost artful process. These videos illuminate the subtle nuances—how to tension the belt just right or align the chain flawlessly—making complex procedures appear effortless. An ordered approach often begins with carefully positioning the drive component, then methodically attaching it to the motor unit, with the video serving as a visual compass guiding the way.
- Begin by threading the belt or chain through the designated pulleys, ensuring there are no twists or kinks.
- Secure the drive mechanism to the motor’s output shaft, tightening bolts evenly to prevent unwarranted wobble or misalignment.
- Double-check the alignment—nothing should be skewed or loose. The harmony of these elements is what sustains the silent glide of your garage door.
In the realm of garage door motor installation, a detailed garage door motor installation video can be your most trusted ally—clarifying the intricacies and transforming a potentially complex process into a precise craft. Connecting the drive mechanism correctly is the heartbeat of your setup, ensuring your garage door operates with grace and reliability for years to come.
Wiring and Power Connections – Ensuring safe and correct electrical connections
Electrical wiring and power connections are the lifeblood of your garage door motor system. Ensuring these connections are safe, correct, and secure is paramount to a smooth and reliable operation. Watching a comprehensive garage door motor installation video can make all the difference—transforming what might seem an intimidating task into a clear, manageable process. These videos often highlight the importance of following precise wiring sequences, avoiding common pitfalls, and adhering to safety standards.
Begin by turning off the power supply at the main circuit breaker to prevent accidental shocks. Next, connect the motor’s power wires to your household supply, paying close attention to the grounding wire—this step cannot be overlooked! For added clarity, many installation videos demonstrate the use of wire connectors and protective covers, ensuring long-lasting safety and durability.
- Check that all connections are tight and free of corrosion.
- Use insulated tools to prevent shorts or mishaps.
When wiring is complete, double-check your work and restore power to test the system. A well-executed electrical connection, guided by a quality garage door motor installation video, guarantees your system’s safety and efficiency, setting the foundation for years of dependable use. Proper wiring isn’t just a step—it’s the heartbeat of your garage door’s harmonious operation.
Programming and Testing the Motor – Setting limits, safety sensors, and verifying operation
In the symphony of garage door automation, the crescendo often hinges on the precision of programming and testing the motor—an act that transforms raw components into a harmonious system. Watching a dedicated garage door motor installation video reveals the artistry behind setting limits, safety sensors, and verifying seamless operation. These visual guides offer an immersive experience, guiding even the most hesitant through the intricate dance of calibration and safety checks.
Begin by entering the motor’s programming mode, often achieved through a series of button presses or a remote control interface. Here, setting the upper and lower limits is paramount—these boundaries determine how far the door travels, preventing overextension or crash. Safety sensors, those vigilant eyes, must be aligned correctly to detect obstructions, halting the door instantly if something crosses their path. Many installation videos emphasize the importance of testing these sensors by placing an object between them—ensuring they respond appropriately.
Once limits and sensors are calibrated, the next step is to verify operation. This involves opening and closing the door a few times, observing for smoothness and responsiveness. To streamline this process, some videos recommend creating a check list:
- Test the door’s full range of motion.
- Ensure safety sensors activate during obstruction.
- Confirm the remote or wall switch commands are responsive.
This meticulous testing phase, guided by an insightful garage door motor installation video, guarantees that every element functions in concert—securing safety and peace of mind for years to come. Programming and testing are not mere steps but the soul that breathes life into the garage door system, elevating it from mechanical parts to a guardian of your space.
Video Tutorials for Garage Door Motor Installation
Benefits of Watching Installation Videos – Visual learning advantages
Watching a garage door motor installation video can transform a daunting task into a manageable project. Visual tutorials provide a step-by-step guide, allowing homeowners and DIY enthusiasts to see exactly how each component fits together. This method of learning is especially advantageous because it bridges the gap between theory and practice, making complex procedures more understandable.
One of the key benefits of watching a garage door motor installation video is the ability to observe proper techniques firsthand. Seeing experts handle tools and connect wiring ensures that safety precautions are adhered to, reducing the risk of accidents. Moreover, these videos often highlight common pitfalls, helping viewers avoid costly mistakes.
Furthermore, a well-produced garage door motor installation video often includes tips on troubleshooting and fine-tuning the system post-installation. This visual approach not only boosts confidence but also accelerates the learning curve, making it easier to achieve professional results. For those seeking clarity and precision, these videos are an invaluable resource in ensuring successful garage door motor installation.
Top Recommended YouTube Channels – Popular channels dedicated to garage door repair
For those embarking on the journey of garage door motor installation, turning to trusted YouTube channels can be a game-changer. Visual tutorials demystify complex procedures, making the process accessible and less intimidating. Top recommended channels dedicated to garage door repair often feature detailed, step-by-step garage door motor installation videos that cater to both novices and seasoned DIY enthusiasts.
These channels typically offer comprehensive content that covers every facet of the installation process. From aligning the mounting bracket to wiring the motor, each step is presented with clarity and precision. Many of these videos also include troubleshooting segments, which are invaluable for ensuring your garage door functions flawlessly after installation.
Some of the most popular channels include experts who emphasize safety and proper tool use, ensuring viewers can follow along confidently. Watching a garage door motor installation video from these sources not only accelerates learning but also enhances safety and professionalism in your DIY project. For those eager to master the craft, these channels are a treasure trove of knowledge and practical tips.
How to Choose the Best Installation Video – Criteria for evaluating quality and clarity
In the realm of DIY garage upgrades, the humble garage door motor installation video emerges as an unsung hero—transforming what once seemed a daunting chore into a manageable task. With over 70% of homeowners preferring visual guidance for complex projects, it’s clear that a well-crafted tutorial can make all the difference. These videos serve as virtual mentors, patiently walking you through each precise step, from securing the mounting bracket to wiring the motor safely. They highlight critical nuances often missed in written instructions, such as correct tool use and safety precautions.
When choosing the best installation video, pay close attention to clarity and comprehensiveness. An excellent garage door motor installation video should:
- Offer close-up shots of key steps, ensuring you see every detail clearly.
- Include troubleshooting tips for common pitfalls.
- Feature expert commentary emphasizing safety and best practices.
Ultimately, a quality tutorial elevates your DIY journey from tentative to confident, making the complex look simple—one precise click at a time.
Step-by-Step Video Breakdown – What to look for in a comprehensive tutorial
In the world of DIY garage upgrades, a comprehensive garage door motor installation video is an invaluable resource, guiding even the most hesitant novice with clarity and confidence. When selecting a tutorial, look for a step-by-step breakdown that balances technical accuracy with visual storytelling, making complex procedures feel accessible. An effective video should showcase close-up shots of each critical step, from positioning the mounting bracket to connecting electrical wiring, ensuring you see every detail clearly. Additionally, a well-crafted garage door motor installation video often includes troubleshooting tips for common issues, saving you time and frustration during your project.
A top-tier tutorial also features expert commentary that emphasizes safety and best practices, transforming a potentially intimidating task into a rewarding experience. Whether you’re installing a belt drive or a chain drive motor, the clarity of instruction combined with detailed visuals makes all the difference. For those seeking the perfect guide, paying attention to these elements ensures your DIY adventure is seamless and successful. Remember, a quality garage door motor installation video isn’t just about watching — it’s about learning, understanding, and conquering the installation with newfound expertise.
Troubleshooting Common Garage Door Motor Issues
Motor Won’t Power On – Check connections, power supply, circuit breakers
When your garage door motor refuses to power on, it’s like encountering a ghost in the machine—silent, stubborn, and frustrating. Before diving into complex repairs, a quick inspection of connections, power supply, and circuit breakers can reveal the lurking culprit. Sometimes, a loose wire or tripped breaker is all that stands between you and smooth operation. Watching a comprehensive garage door motor installation video can illuminate these issues vividly, guiding you step-by-step through troubleshooting.
In many cases, the problem stems from simple electrical glitches rather than faulty hardware. Ensure that the power source is active, connections are secure, and circuit breakers haven’t tripped. If everything appears intact but the motor still won’t energize, consider testing the power outlet with another device. A well-made garage door motor installation video often highlights these diagnostic steps with visual clarity, making troubleshooting less of a chore and more of an adventure in technical mastery.
Door Not Opening or Closing Fully – Limit settings and sensor alignment
When your garage door refuses to budge despite the motor humming away like a stubborn mule, it’s time to troubleshoot. Often, the culprit isn’t a malfunctioning motor but rather a simple misalignment or limit setting gone rogue. A quality garage door motor installation video can be your best friend here, visually guiding you through the labyrinth of potential issues. These videos often highlight how to check sensor alignment and adjust limit switches, which are common reasons for the door not opening or closing fully.
In many cases, the fix is as straightforward as realigning sensors or tweaking the limit settings—no need to call in the cavalry. You might even find that a bit of patience and the right tutorial can turn you into a garage door repair hero. Remember, a well-made garage door motor installation video doesn’t just show you what to do; it demonstrates how to do it with clarity and precision, making troubleshooting feel less like a chore and more like a technical dance. So, grab your tools and let the visual journey begin!
Strange Noises During Operation – Identify and fix mechanical issues
Strange noises during garage door operation can turn a smooth opening into a symphony of squeaks, bangs, and groans. These sounds often signal mechanical issues lurking beneath the surface—things like misaligned gears, worn rollers, or loose hardware. Instead of panicking or calling in the pros immediately, a good garage door motor installation video can be your secret weapon. These tutorials often highlight how to identify rattles, grinding, or knocking, helping you pinpoint exactly what’s causing the disruption.
Sometimes, the culprit is as simple as a loose bolt or a worn-out bearing. To make diagnosing easier, consider following an ordered list of steps from a reliable garage door motor installation video:
- Listen carefully to the type of noise and when it occurs.
- Inspect for visible signs of wear or damage.
- Check for proper alignment of the drive mechanism.
- Test the motor with the door in various positions to observe when sounds intensify.
By diving into a detailed garage door motor installation video, you can often uncover quick fixes—like tightening a component or replacing a worn part—that restore peace and quiet to your garage. Remember, these videos are designed to make troubleshooting less intimidating, turning what seems like a mechanical mystery into a manageable puzzle. So, grab your toolkit, hit play, and let the visual guidance lead you through every squeak and squeal—because sometimes, the solution is just a click away!
Remotes Not Responding – Reprogramming and signal interference solutions
In the realm of DIY garage door repairs, a garage door motor installation video can be your most trusted confidant—saving you time, money, and the frustration of guesswork. When remote controls refuse to respond, the culprit is often a misaligned signal or a forgotten reprogramming ritual. These glitches are more common than you might imagine and can be remedied without the need for a professional locksmith or technician. Watching a reputable garage door motor installation video provides step-by-step guidance, demystifying the reprogramming process and revealing how to eliminate pesky signal interference.
For example, you might need to reset your remote’s programming or check for obstructions in the signal path. Sometimes, interference from nearby electronic devices or even faulty batteries can cause these issues. An effective garage door motor installation video not only shows you how to reconfigure your remote but also highlights troubleshooting signals that simply won’t respond. A quick inspection of the remote, followed by a reprogramming sequence—often just a matter of pressing a few buttons—can restore seamless operation. With visual cues and clear instructions, you’ll find that resolving remote responsiveness issues is more manageable than you’d think. Truly, the right tutorial turns what seems like a technological nuisance into a straightforward fix, all from the comfort of your living room. Because when it comes to garage door operation, a little knowledge—gleaned from a quality garage door motor installation video—goes a long way in keeping your garage secure and functioning smoothly.
Maintaining Your Garage Door Motor for Longevity
Regular Inspection and Maintenance Tips – Lubrication, cleaning, and safety checks
Maintaining your garage door motor isn’t just about avoiding the dreaded squeak or grind; it’s about ensuring your hefty door stays operational for years to come. Regular inspection and a bit of TLC can significantly extend the lifespan of your garage door motor. Think of it as giving your motor a spa day—lubrication, cleaning, and safety checks are the essentials.
A well-lubricated drive mechanism, for instance, reduces strain on the motor and keeps things running smoothly. Use a high-quality lubricant specifically designed for garage door parts—skip the WD-40, unless you want a quick fix that’s more smoke than substance. Cleaning debris from the tracks and sensors prevents misalignment and unexpected closures.
For those who prefer a visual guide, a garage door motor installation video can be your best friend. Watching a comprehensive tutorial helps you spot potential issues early and understand exactly how to keep your motor humming like a well-oiled machine. Remember, a little maintenance now saves a lot of headaches later!
When to Call a Professional – Signs that require expert intervention
Maintaining your garage door motor for longevity isn’t just a matter of routine—it’s a testament to your dedication as a homeowner. Over time, even the most robust garage door motors can falter without proper care. Recognizing the signs that indicate when to call a professional can save you from costly repairs or dangerous mishaps. If your garage door motor installation isn’t functioning as it should—such as persistent motor failure or erratic operation—it’s time to seek expert intervention.
Strange noises, inconsistent opening or closing, or a complete lack of response from your remote are telltale clues that your motor needs a professional touch. Sometimes, these issues stem from misaligned sensors or faulty wiring—problems best handled by seasoned technicians. A well-executed garage door motor installation video can demystify the process, but when safety is at stake, trusting a professional ensures that your investment remains protected. Remember, a little vigilance now can prevent a costly catastrophe later. After all, your garage door motor is the silent guardian of your castle—treat it with the care it deserves.
Upgrading Your Garage Door Motor – Advantages of modern, smart technology
Maintaining your garage door motor for longevity isn’t just about routine checks; it’s about safeguarding your investment and ensuring safety. An essential tool in this process is a well-made garage door motor installation video. These videos serve as visual blueprints, guiding homeowners through the intricacies of installation and maintenance with clarity and precision. Watching a comprehensive garage door motor installation video can reveal subtle details and best practices that manual instructions often miss, making the entire process more accessible and less daunting.
Upgrading your garage door motor with modern, smart technology offers numerous advantages. These advanced systems enhance security, allow remote operation via smartphone apps, and often include features like automated lighting and real-time alerts. A good garage door motor installation video can highlight how to integrate these smart features seamlessly, saving time and reducing errors. Embracing innovation not only boosts convenience but also extends the lifespan of your garage door system, protecting your property long-term.
By choosing a high-quality garage door motor installation video, you gain insights into the latest trends and technologies. This resource demystifies complex wiring and calibration tasks, making upgrades more straightforward. Whether you’re installing a new motor or upgrading an existing one, the clarity of these videos helps ensure your system functions smoothly, providing peace of mind and safeguarding your home against potential issues down the line. In South Africa’s evolving market, staying updated with the latest in garage door technology is an investment in both security and convenience.

0 Comments