
Understanding Overhead Door Opener Clearance Requirements
Why ceiling height matters for automatic door systems
One misplaced centimetre can disable an entire automatic door system. Overhead door opener clearance requirements exist for a simple reason: the motor’s arm needs a specific arc to raise and lower the door properly. In South Africa, garage ceilings often sit lower than international standards, so precise measurement of the garage door motor height becomes critical. A standard opener demands at least 300 millimetres between the door’s highest point and the ceiling for the chain drive to operate without friction!
Ceiling height matters for automatic door systems because it dictates the horizontal track angle. Too little headroom forces a steep curve, causing the door to bind on the track and overheat the motor. Too much headroom, while less common, can leave the trolley unsupported at its highest travel point. In practice, installers account for the spring tension,the cable drums,and the positioning of the motor.
Standard residential ceiling heights and their implications
Most South African homes use a ceiling height of 2.4 metres. That specific figure matters because it usually leaves roughly 300 millimetres of headroom after the door panel is fully open. That gap is the bare minimum for a standard chain drive unit to function. If your garage door motor height is too large, meaning the ceiling sits much higher, you might need to extend the rail. This is not a problem, but it does change the mounting position for the power unit.
However, many older properties and some new townhouse complexes use a ceiling height of 2.1 metres. This forces the horizontal track to slope sharply. That steep angle often causes the garage door motor height to be insufficient for the trolley to disengage the manual release. You will find that a low-headroom kit is usually the fix here. Consider these scenarios:
- 2.4m ceiling, standard clearance, no extra parts needed.
- 2.1m ceiling, low headroom kit required for safety.
- 3.0m ceiling, motor must be elevated on a pedestal.
A full 3 metre ceiling is uncommon in residential zones, but it does occur in double-storey designs. That extra space does not harm the mechanism, but it requires a longer drive screw. The key takeaway is that the opening height and the ceiling height must align to keep the motor’s travel path true.
Factors that influence required headroom (track radius, door type)
Track radius and door type, not ceiling height alone, dictate the true clearance requirement. A standard 305 millimetre radius suits most sectional doors, while a low-headroom track uses a tighter bend to save space. The garage door motor height must match the track’s arc, or the trolley will strain against the curve.
- Sectional doors: require clearance for the full panel stack.
- Tip-up doors: pivot neatly, needing less overhead space.
- Vertical-lift tracks: demand significant height, rare in homes.
I once measured a garage where the motor sat flush against the ceiling, yet the door refused to close. The culprit was a sharp radius that pinched the panel. Door type changes this calculus entirely. A heavy timber sectional door needs a motor with more torque, which often means a bulkier power unit and altered mounting. The garage door motor height becomes a matter of physics, not preference.
The difference between header space and side space
The single most overlooked measurement in a garage isn’t the door itself, but the space immediately above it. Homeowners often measure their ceiling height and assume they are ready for an automatic opener, only to discover the motor has nowhere to go. The real culprit is the distinction between header space, the distance from the door’s top to the ceiling, and side space, the room available on the jambs. For a garage door motor height to be correct, you need roughly 15 to 18 inches of clear headroom. This is the critical zone where the drive unit slides back when the door is fully raised.
However, this standard measurement is not a universal constant. Low-headroom situations, often found in newer estate homes with architectural beams, demand a specific type of track. A modified flag bracket and a horizontal track that angles downward are common solutions. Conversely, high-lift systems, which are excellent for storing a lift kit or an extra fridge, create a dramatic vertical rise before the curve. This changes the physical position of the motor entirely, requiring a longer chain and a different mounting configuration.
The most frequent mistake I encounter is the attempt to force a standard trolley system into a space with insufficient clearance.
– Always check for light fixtures, pipes, or ductwork that may hang lower than the ceiling.
– Remember that the spring torsion bar sits above the door opening; its turning radius eats into your headroom.
– If your headroom is under 12 inches, you will require a specific low-clearance setup, not standard rails.
In one installation, a client had the perfect ceiling height but a massive heating duct running directly above the door track. We had to reposition the entire garage door motor height with an extension kit to clear the obstacle. Failing to account for the motor’s back-hang, which is the length of the rail behind the top bracket, resulted in the rail colliding with the duct. It is a tight squeeze, and understanding the geometry of the track radius is just as crucial as the horsepower of the motor itself.
Measuring the Space Above the Door Opening
Tools needed for accurate vertical space assessment
It is a silent, measured gamble played out in the dusty shadows above your head. The true villain in the story of a failed garage installation is rarely the mechanism itself, but the unforgiving geometry of the space it must occupy. Before you even consider the weight of the door or the power of the motor, you must confront the void above it. This is where the fate of your automatic system is decided, and where many a homeowner has met their match with a tape measure and a furrowed brow.
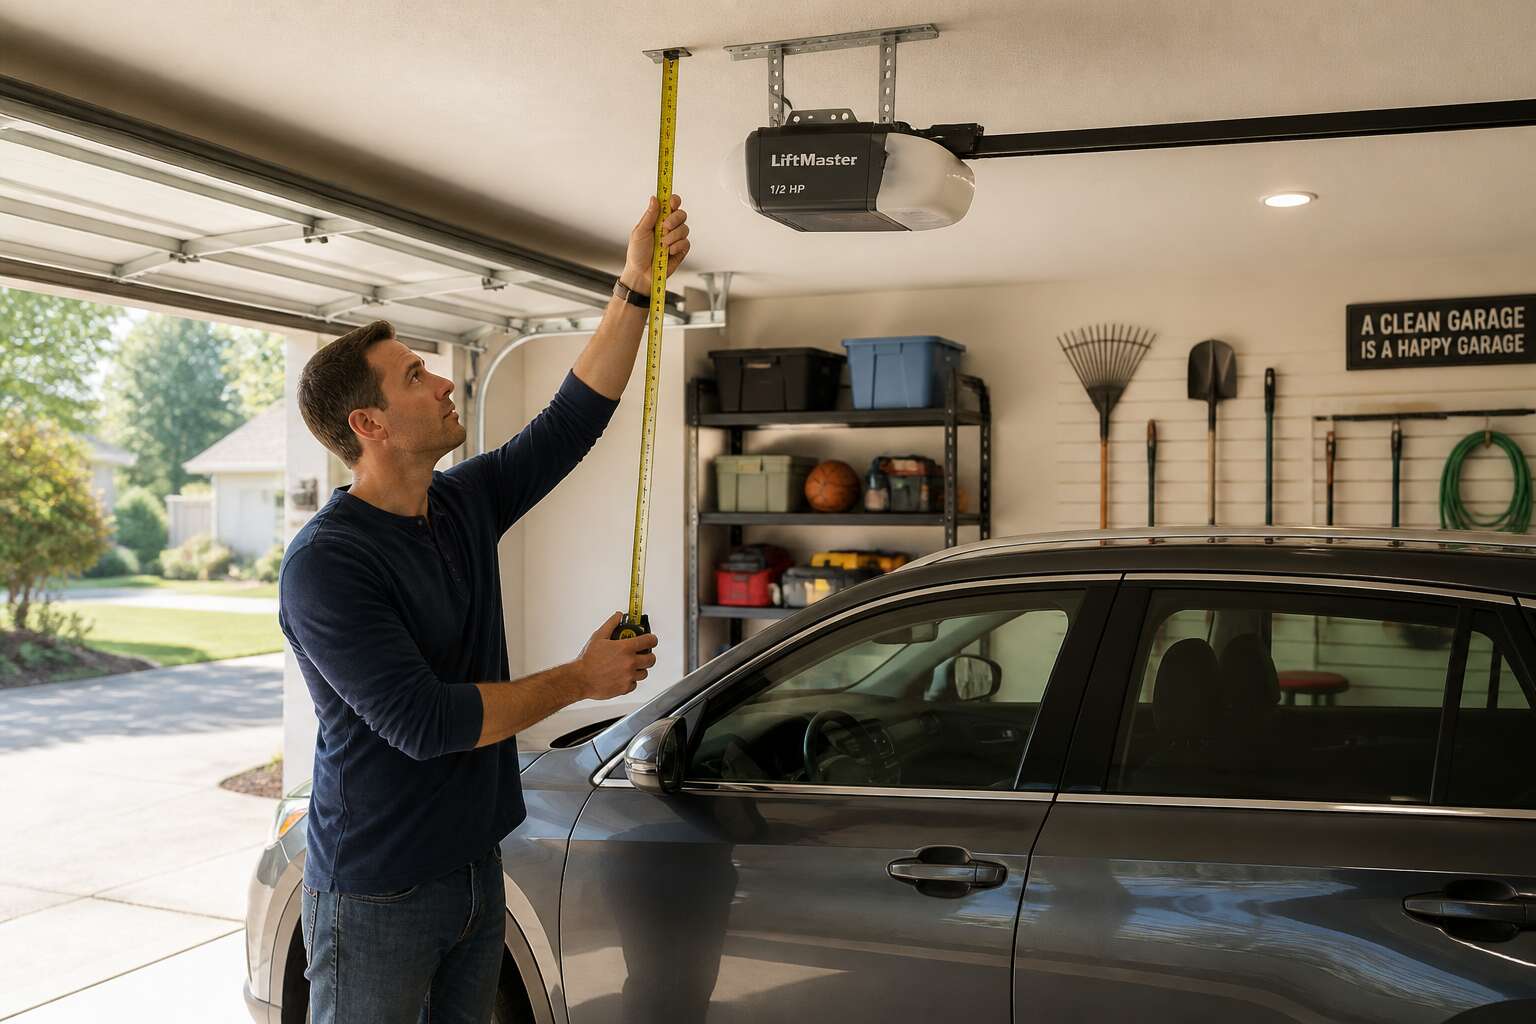
To conquer this domain, you need more than just a stepladder. You require a reliable tape measure that extends beyond the standard two meters, a pencil for marking, and a flashlight to pierce the gloom. This is a two-person operation; one set of hands is for holding the ladder, the other for wrestling with the tape. You are attempting to determine the exact distance between the top of the door panel in its fully open position and the lowest point of the ceiling obstruction, usually the horizontal track support. This measurement is the cornerstone of your entire project.
Once you have your tools, the process is methodical. You are not guessing; you are documenting a precise figure.
1. Disconnect the opener: If an old unit is still attached, disengage it so you can move the door manually without fighting the motor.
2. Open the door fully: Lift the door until it is flush against the ceiling or header. This is its highest point of travel.
3. Measure the clearance: From the top edge of the door, measure straight up to the ceiling. Record this number. If you have a high-lift or vertical-lift system, the dynamics change, but for a standard sectional door, this vertical headroom is your primary figure.
Finally, you must record the side clearance, measuring the space between the vertical track and the wall. This is often ignored, yet it is crucial for the spring torsion assembly. A minimum of 3.5 to 4 inches is typically required on each side for the motor and hardware to function without binding. When you have these numbers, compare them against the manufacturer’s manual for the specific garage door motor height requirements, as some units are more demanding than others. If your headroom is less than the recommended 12 inches, you are looking at a space issue that no amount of motor torque can solve. That is when you call in a professional, because a miscalculation here is not just a malfunction; it is a collision waiting to happen.
Step-by-step process to measure from the header to the ceiling
Tape measure, pencil, and a flashlight. This ritual, repeated by every installer, determines everything that follows for your garage door motor height. You are searching for clearance, the breathing room between the top of the door’s arc and the ceiling joists above it. A garage door motor height that is doomed from the start is usually a result of a bad measurement taken in haste.
Here is the method for measuring the void above the opening.
- Disconnect the existing trolley from the door, or unplug the current operator entirely. You need a door that moves freely without the resistance of a machine pulling against you.
- Pull the door up until it stops. If you have horizontal tracks, the bottom roller should sit right at the curve. If you have a low-headroom kit, the door will be tighter to the lintel, but you still need to find that exact point where the top section is fully parallel to the floor.
- Now, look at the top edge of the top panel. From that specific corner, measure straight up to the lowest obstruction overhead. This is usually the ceiling, but it could be a joist, a light fixture, or even a structural steel beam.
- Mark that distance on the wall. You now have your “headroom” figure. This single number tells you if a standard track radius will work or if you need to pivot your thinking entirely. Do not assume a clean ceiling means there is nothing in the way; pipes and cables are notorious for stealing two precious inches from your garage door motor height.
A common error involves measuring only the center of the opening. The center is often the highest point, but the door spring is mounted on the sides. If the track and springs need 3.5 inches of side room, and the ceiling slopes down at the edges, your center measurement will lie to you. You need the measurement at the extremes, because the vertical clearance can shrink as you move toward the tracks.
Do not take the stated radius of the track for granted either. A 12-inch radius is standard, but a 15-inch radius makes the door travel in a larger, higher arc. This arc eats into your headroom. If you have exactly 4 inches of clearance, a high-lift system might be the solution, but a standard radius track will jam against the header before you even switch on the power. Knowing the physical constraints of the opening allows you to choose the right components, giving you a garage door motor height that functions quietly and safely for years. The space above the door is not just a gap; it is the physical envelope that dictates your entire mechanical strategy.
Common measurement mistakes that lead to installation failure
Measuring the space above your garage door opening is one of those tasks that seems simple until precision actually matters. In South Africa, where homes often feature unique architectural layouts and limited overhead space, getting this wrong can turn a straightforward installation into a costly headache. The single most important figure you need is the garage door motor height. This is the vertical distance between the top of the door opening and the lowest point of the ceiling or any obstruction above it. Without this number, your new motor might fit perfectly, or it might refuse to operate at all.
Before you grab a ladder, you need to isolate the door from the existing mechanisms. Disconnect the trolley from the door or unplug the current operator completely. You want the door to move freely, without the resistance of a machine pulling against it. This gives you a true sense of the physical travel path and prevents accidental activation while you are working in a potentially hazardous position.
With the door disconnected, pull it up manually until it stops. For doors with horizontal tracks, you will notice the bottom roller sits right at the curve of the track. If you have a low-headroom kit installed, the configuration will be different, but the goal is the same: you need to find the exact point where the top section of the door is fully parallel to the floor. This is the highest point the door will physically reach.
Now, look at the top edge of that top panel. From that specific corner, measure straight up to the lowest obstruction overhead. This is usually the ceiling, but it could also be a joist, a light fixture, or even a structural steel beam that runs across the garage. Mark that distance on the wall with a pencil. This marked figure is your definitive “headroom” distance, and it dictates everything about the motor you can purchase.
However, a common mistake involves measuring only the center of the opening. The center is often the highest point, but the door spring is mounted on the sides. You must measure at the extremes, right where the vertical tracks are located. If the ceiling slopes down towards the edges, your center measurement will lie to you. The vertical clearance can shrink considerably as you move outward, and those side measurements are the ones that truly matter for the garage door motor height clearance.
Do not take the stated radius of the track for granted either. A standard 12-inch radius is common, but a 15-inch radius makes the door travel in a larger, higher arc. This larger arc eats into your headroom significantly. If you only have 4 inches of clearance and you assume a standard radius, the track will jam against the header before you even switch on the power. Knowing your physical constraints allows you to choose the right components, ensuring your garage door motor height functions quietly and safely for years. The space above the door is not just a gap; it is the physical envelope that dictates your entire mechanical strategy.
To make sure you have covered all your bases, run through this quick checklist before heading to the store:
– Measure the vertical distance at both the left and right sides of the opening.
– Identify the lowest obstruction, not just the average ceiling height.
– Check the track radius to understand the door’s arc travel.
– Compare your lowest measurement against the motor’s minimum headroom requirement.
Taking these steps will save you from purchasing a motor that physically cannot fit in your space.
Documenting measurements for the installer
The Forgotten Art of Writing Numbers Down
Once you have wrestled with a ladder and contorted your neck to see the corner where the wall meets the ceiling, the data you collect is precious. Yet many homeowners commit a cardinal sin: they take the measurement, nod sagely, and then promptly forget the exact figure by the time they sit down to browse the internet. The tape measure reads 310mm, but the memory reads “about a third of a metre”. That vagueness is the enemy of progress.
The solution is to document the dimensions with deliberate intent. Write the figures on the wall next to the opening, directly on the header. Do not rely on a photograph, because perspective lies on a camera lens. Use a pencil to scratch the number into the plaster, or use a marker to write it on the track itself. If you invite a professional installer to provide a bid, this recording removes all ambiguity from the conversation. They can stand on the ladder and verify your math without performing their own rhythmic ritual of measuring and forgetting.
This habit of recording serves a greater purpose. It creates a permanent record that will survive your memory of the home improvement project. The installation technician who arrives next Tuesday will appreciate the insight more than you know. When two different tradespeople measure the same gap with different tape measures and get the same result, that is a rare and beautiful thing in the construction world.
– Write the figure on the back of the motor housing.
– Write the figure on the wall with a permanent marker.
– Email the figure to yourself.
– Take a photo of the tape measure in position.
Once you have the accurate figures, you can proceed confidently. If the ceiling clearance on one side of the door is 280mm and the other side is 310mm, the garage door motor height must accommodate the smaller figure, not the average. The lower number is the absolute limit. The documentation ensures the entire site knows which number actually matters. What seems like a trivial side note can become the definitive data point for the entire project, and the mechanical movement will remain peaceable and effective for years to come.
The Impact of Low Headroom on Drive Unit Placement
Differences between standard, low-clearance, and high-lift configurations
Low headroom presents a hidden adversary for any garage door motor height. When the space between the top of the door and the ceiling is tight, a standard horizontal track setup becomes impossible. The curvature of the track needs a specific radius to function smoothly, and a standard motor simply hangs too low for the door to travel that arc. You end up with the opener colliding with the top panel or the entire system jamming.
This constraint often forces a choice between two paths. You can install a low-clearance track kit, which uses a shallower radius to fit the slim space, but this increases the tension on the spring system. It complicates the job substantially. Alternatively, you might consider a side-mounted jackshaft unit. Placing the motor on the wall beside the track frees up that precious overhead volume entirely.
The configuration really breaks down into these primary styles:
– Standard lift: Requires roughly 12 to 15 inches of headroom for a torsion spring system and standard radius track.
– Low clearance: Solutions exist for a mere 3 to 5 inches, using special track brackets that pivot the radius tighter.
– High lift: This moves the horizontal track higher up onto the wall, demanding much more vertical space but offering excellent headroom for car lifts or extra storage.
High-lift installations are the opposite problem; they give you plenty of room. But the low-clearance version is where careful planning matters most. I have seen many attempts to just “force” a standard unit into a tight space, and it always results in premature cable wear. The lift angle changes, and the motor strains to compensate. Always measure that overhead gap carefully before purchasing. That single number dictates whether you need a full vertical lift or a compact radius setup for your garage door motor height.
How limited vertical space affects the power unit’s mounting position
Reports from garage door service teams show that nearly a third of all callouts involve a motor that simply cannot fit. Limited vertical space does not just change the track; it dictates where the drive unit itself can live. When headroom shrinks below 10 inches, the typical ceiling-mounted trolley becomes a hostage to that same confined gap. The power unit hangs low, intruding into the space where the top panel must travel.
This forces installers to make ugly compromises.
– The motor body sits lower, reducing the door’s actual opening height.
– The drive rail angles downward, altering the force required to lift the panel.
– The tension on the torsion spring must be recalculated for the new geometry.
In homes with cathedral ceilings or a steel beam directly above the header, the situation worsens. The rail cannot be level, so the carriage drags. I have seen motors mounted with staggering shims just to clear a light fixture. The result is a unit that vibrates, strains, and eventually strips its own gears. A jackshaft system sidesteps this entirely, but it demands a low headroom track kit to function correctly. Before you purchase anything, verify the ceiling clearance with the door fully open. Your choice of garage door motor height is only theoretical until that measurement confirms the physical placement.
Adjusting the torsion shaft and track for tight spaces
Low ceiling clearance forces installers to rethink the entire drive unit. The torsion shaft often needs repositioning closer to the header. This changes the cable drum alignment. The track radius must shrink to accommodate the smaller space. I have seen technicians bend track brackets for a few millimetres.
Adjusting the torsion shaft for tight spaces requires careful measurement. The spring tension must match the reduced travel distance. The track’s curvature determines how smoothly the door transitions. When headroom drops below eight centimetres, the motor sits further back. This lowers the drive chain angle and increases wear.
Ignoring low headroom causes:
- Door hits the motor housing mid travel.
- The torsion spring uncoils unevenly.
- The drive gears strip under the added strain.
Garage door motor height is not a fixed specification. It is a variable that shifts with every adjustment to the shaft and track. Proper fit requires recalculating the geometry.
The role of the emergency release cord in confined spaces
The silent struggle begins with the ceiling. In many South African homes, the space above the garage door opening is a precious commodity. When the architectural plans call for a low headroom, the engineering of the entire door system tightens. The motor must fit, the tracks must curve, and the torsion spring must compress. Every millimetre counts.
Most standard installations assume a clear headroom of around 300 to 350 millimetres. This allows the horizontal tracks to sit level with adequate space for the motor bracket. But when a builder sacrifices that space for a flat ceiling or a passing air conditioner duct, the installer faces a puzzle. The garage door motor height becomes the central figure in this spatial equation. You cannot simply mount the motor lower; the trolley must engage the top section of the door without scraping the lintel.
When we talk about low headroom, we are usually referring to a clearance of less than 150 millimetres. In these cramped quarters, a standard track setup fails. The radius of the track must be reduced, forcing the door to bend more sharply as it opens. This curvature directly influences the garage door motor height required. A higher vertical track will require a different mounting position for the drive unit, often pushing it deeper into the garage, which can then conflict with the door’s travel path when it is fully open.
The physical mounting of the motor is only half the battle. The torsion shaft sits parallel to the door, holding the springs. With inadequate vertical space, the spring support bracket cannot sit tall enough, restricting the coil diameter. If you are dealing with a situation where the header is tight, you might need to use a vertical-lift system or a track with a low-headroom bracket. This kit shifts the track closer to the wall, which alters the geometry of the cable drums. A change in drum diameter here requires a recalibration of the limit switches on the garage door motor height, otherwise the door will not fully seal against the floor.
Overlooking these measurements leads to a cascade of mechanical failures. Consider the strain on the system when the drive chain runs at too steep an angle. The excessive angle increases friction, causing the motor to run hotter and slower. This prolonged strain often results in:
– Premature wear of the sprocket teeth.
– Slipping of the drive chain under heavy load.
– The emergency release cord hanging too low, becoming a hazard for vehicles entering the garage.
The position of the motor relative to the spring shaft creates a torque vector. If the garage door motor height is not aligned correctly, the operator transmits an uneven force. The door will begin to twist on its hinges, leading to cosmetic damage and a shortened lifespan for the panels. In extreme cases, the motor bracket itself might flex, causing the rail to vibrate violently.
I recall a specific installation in a Randburg townhouse where the architect designed a bulkhead for lighting but forgot the garage door entirely. We had only 120 millimetres of headroom. The solution was not just a smaller motor, but a repositioning of the entire drive assembly. We had to lower the torsion shaft mounting flange and use a tangential wheel, which reduced the required vertical clearance. The garage door motor height issue was resolved by moving the unit sideways, using a chain hoist to sit the motor adjacent to the spring, rather than directly above it. This reconfiguration requires a keen eye for the clearance of the spring brackets.
The interaction between the track radius and the motor’s push force is critical. A standard 12-inch radius will not function when you only have a few centimetres to play with. You must switch to a 10-inch radius or even a low-headroom track. This change impacts the garage door motor height because the top panel moves further away from the vertical centre line. The logic is simple: the deeper the curve, the less vertical space it needs, but the more horizontal space the door consumes. The motor must be mounted high enough to clear the back of this arc but far enough back to avoid the door section travelling into it.
Of course, the emergency release function cannot be ignored. This cord drops down from the carriage assembly. If the garage door motor height is set too high to compensate for low headroom, the release cord becomes nearly inaccessible. Conversely, if the motor is too low, the cord tangles in the spring shaft as it rotates. Balancing accessibility with mechanical clearance is a fine line. In a tight space, a custom-length release cable is often necessary to bring the handle to a convenient height without allowing slack to wrap around the drum.
Properly addressing the garage door motor height in a confined space is about understanding the kinetic chain. The door’s balance is set by the spring, but the motor only acts as the catalyst. When the spring cannot expand fully due to the low ceiling, the motor picks up the slack. This is a recipe for a weak system. A technician must always verify the spring’s maximum wind cycles against the motor’s rated hourly starts. A door that fights gravity requires a motor that runs longer, which burns out the capacitor faster.
Facing these structural constraints from the outset changes the approach. The garage door motor height is not an afterthought; it is the primary design criterion that dictates the support structure. A steel channel must be welded to the floor or wall to anchor the trolley rail, ensuring it does not wobble when the door moves. This rigid foundation ensures that the torque from the motor is effectively transferred into lifting the door, rather than being absorbed by the mounting brackets. The final result is a door that glides effortlessly, despite the architectural limitations pressing down from above.
Choosing the Right Opener Based on Available Vertical Space
Matching the drive type (chain, belt, screw) to ceiling constraints
The soul of a mechanism often whispers its secrets through space. A high ceiling can feel like a cathedral; a low one, a crypt. The choice between a chain, belt, or screw drive opener is not merely a matter of preference, it is a matter of survival for your garage door motor height. Each drive type demands its own measure of clearance from the bulkhead to the highest arching point of the door’s travel.
A belt drive, with its smooth and silent carriage, usually finds contentment in standard headroom. It requires less clearance for the rail, but the power unit itself still needs a predetermined drop. Chain drives are the old workhorses, rugged and unyielding, but they are also the most demanding. Their heavy, clattering carriages and thicker rails need the generous space of a conventional ceiling to operate without scraping the rafters.
Screw drives, however, offer a curious advantage. They live without the need for a track that dips and rises, instead using a rotating shaft to pull the carriage. This design often allows for a more compact motor placement, making it the only fitting choice when the headroom is miserly. The relationship is always a negotiation.
– Measure the available vertical space with a steel tape, not a laser guess.
– Consult the opener’s specification sheet for the required rail angle.
– Identify if the ceiling is finished or if it hides valuable open joists.
However, a screw drive still needs its motor to sit clear of the door’s apex. The imbalance of forces can cause the torsion spring to fight the motor, a conflict that leads to premature wear. A motor mounted too low will scrape the top panel of the door, a ghostly grinding sound that haunts every opening. The installer must align the shaft with the door’s curve, adjusting the J-arm to a perfect perpendicular angle. It is a precise choreography where a few centimeters dictate the entire performance, and in South Africa, where space is often a luxury, this precision is paramount.
Wall-mounted or side-mounted alternatives for restricted areas
Garage door motor height is not a fixed law, but a negotiation between the machine and your architecture. When the dogged architecture offers no compromise, there is a path. The wall-mounted opener, a creature of the modern age, abandons the ceiling entirely. It affixes to the wall beside the door, its motor a sentinel on the brick, connected to the torsion bar. This configuration requires negligible headroom. It is the solution for the crypt, for the crawl space where a drop ceiling seals your fate.
This design offers a particular freedom. There is no rail to sling from the rafters, no carriage to scrape the plaster. The motor’s placement shifts the balance of power, turning the torsion spring into the primary mover. The lock mechanism is engaged by a mechanical latch, not by the sheer force of a motor pulling a cart. It is a fundamentally different interaction.
Consider these requirements before you choose this path:
– The torsion bar must be in reach of the motor’s drive gear, so proximity is critical.
– A power outlet near the wall mount is mandatory, as the unit does not share the ceiling’s wiring.
– The motor may obstruct some storage space, so plan the wall layout.
The door moves with a different silence. There is no whisper of chain or belt. The opener speaks directly to the bar, turning it with a smooth, mechanical authority. When space is a luxury, and South African garages often treat it as such, this is the only logical answer. The motor height becomes a question of side clearance, not vertical volume. For the conventional setups, the debate over the perfect garage door motor height rages on, but here, in the confined, the argument is finished. The wall itself becomes the stage for the performance.
Consulting manufacturer specifications for minimum clearance values
Vertical space is not a universal measurement. It changes with every roof pitch and beam. The right opener matches its dimensions to that reality. Manufacturer minimum clearance values enter the conversation. Every motor unit ships with a spec sheet listing the lowest headroom it will tolerate. Ignore it and you will hear the rail groan against the framing.
Compare your measured gap to that spec sheet before buying. The door’s track radius and spring configuration affect the number, but the motor’s own footprint matters equally. A long rail needs horizontal room. A compact unit needs less, though its power output may demand a different bracket. When you set garage door motor height, the clearance value is your contract with physics.
- Record the distance from the header to the lowest obstruction.
- Find the required clearance for the specific model.
- Subtract the manufacturer’s allowance from your actual gap.
Only a positive remainder means a safe install. A negative one means a low-clearance rail or a wall-mount. That choice is simple once the numbers sit side by side. The spec sheet does the arguing for you.
Evaluating motor horsepower against available headroom
A motor’s horsepower is meaningless if the rail cannot sit flat. The garage door motor height dictates which unit physically fits, and that dimension influences performance. A high-lift door with limited headroom may force you into a compact chassis, but that chassis might lack the torque for a heavy double door.
Consider the physical reality of the space:
– Taller motors with long rails need more vertical clearance to avoid binding during operation.
– Compact units may fit, but their reduced power requires a perfectly balanced spring system.
A 1.25 HP motor in a tight space can cause more vibration than a 0.75 HP unit designed for that footprint. The right choice balances the measured gap against the motor’s structural demands, not just the rated pull force. Your garage door motor height is the fixed variable; the opener must adapt to it, not the other way around.
Troubleshooting and Adjusting for Insufficient Overhead Space
Extending the track and re-aligning the hangers
Frequently, the first whisper of trouble is not a metallic groan but a mechanical stutter. The operator unit fights a losing battle against angles it was never designed to accommodate. When the header space falls critically short, you are not merely adjusting hardware; you are renegotiating the physics of the entire system.
To wrestle back those precious centimeters, you must first consider the track’s geometry. Extending the track outward modifies the arc of travel, allowing the door to clear the opening before it curves toward the ceiling. This is a precise operation, often requiring new radius sections and careful re-bolting. Simultaneously, you must re-align the hangers. A hanger that leans a single degree off plumb will introduce friction that the motor must overcome.
1. Disconnect the operator from the torsion shaft to release all tension.
2. Loosen the track brackets and support angles without removing them entirely.
3. Reposition the track to the new extended angle, checking for vertical plumb.
4. Re-tighten the hardware and inspect the belt or chain for slack.
It is a delicate dance. The repositioning of these components directly influences the optimal garage door motor height, particularly regarding how the drive mechanism engages with the carriage. A misaligned track forces the motor to strain, shortening its operational lifespan. Measure the distance from the top of the door panel to the required motor mounting plate. Ensure that the new trajectory provides sufficient clearance for the motor’s chassis, preventing a scenario where the unit grazes the drywall or the door itself. The goal is a harmonious fit where the machine hums without hesitation, its height now perfectly matched to its environment.
Using low-headroom brackets and radius reducers
Nearly thirty percent of garage door motors fail prematurely because of mounting positions forced by cramped ceiling voids. Low-headroom brackets and radius reducers provide a practical remedy, bending the track’s arc to fit spaces that reject standard geometry. Once fitted, the garage door motor height settles closer to the header, clearing the lintel without sacrificing tension on the drive mechanism.
- Detach the operator arm from the door carriage.
- Replace the track’s radius section with a reducer that tightens the curve.
- Bolt the low-headroom bracket to the wall channel, verifying plumb with a spirit level.
- Reattach the motor and adjust the limit switches to match the new travel path.
The resulting configuration shifts the system’s centre of gravity, yet the motor’s electronics adapt without complaint. From my work in older South African homes, a proper low-headroom setup reduces travel noise and extends actuator life. Confirm the gap between the top panel and the power unit, because ten millimetres of error will generate a chronic whine. That measurement defines the correct garage door motor height for your specific ceiling void.
When to consider raising the ceiling or structural modifications
Troubleshooting and Adjusting for Insufficient Overhead Space
When a garage door motor height miscalculation leaves you with a drive unit pressing against the ceiling joists, the symptoms are unmistakable. The operator strains, the belt or chain seesaws with a dull thud, and the door refuses to seat flush against the floor. I have walked into countless South African garages where the previous installer simply gave up, leaving the motor dangling at a precarious angle.
Your first recourse is to re-evaluate the emergency release mechanism. A cable routed incorrectly will bind against the motor housing when the ceiling void is tight. Disconnect the carriage, pull the release cord, and cycle the door by hand. If the door moves freely but the motor grinds, the problem is the mounting, not the mechanism. Shift the power unit laterally along the hanging brackets. You may gain the necessary garage door motor height clearance simply by sliding the operator closer to the wall.
Check for obstructions that sit above the track, such as light fittings or electrical conduits. In older homes, I often find asbestos ceilings that have sagged over decades, robbing you of fifty millimetres of space. The fix here is to reposition the hangers.
– Remove the existing hanger bolts and support the rail with a temporary prop.
– Raise the rail section by increments of ten millimetres.
– Re-drill the hanger holes into the ceiling joists, ensuring they are plumb.
– Reattach the motor and test the travel.
If the geometry remains hostile, you must consider structural intervention. Raising the ceiling is a significant project, but it is the only permanent solution when the garage door motor height falls short by more than fifty millimetres. This entails lifting the roof trusses or installing a bulkhead to box out the drive unit. Before you commit, measure the distance from the lintel to the underside of the roof. You need at least three hundred millimetres for a standard radius track. Also, verify the lintel itself. A reinforced concrete beam can be notched, but a masonry wall may require steel shoring. In the coastal suburbs of Durban, I have seen homeowners opt for a high-lift track conversion instead of a full ceiling raise.
This approach pushes the door closer to the lintel when open, freeing up space around the motor. The tradeoff is a more powerful spring system and reinforced track brackets. Inspect the top panel of your door for section height. If you have a 406 millimetre panel, a high-lift conversion will not give you the headroom you need. Structural changes must be signed off by a professional engineer.
At the very least, add a small access hatch near the motor. This allows you to adjust limit switches and lubricate the drive sprocket without dismantling the entire system. The garage door motor height issue becomes manageable when you treat the ceiling void as a living space, not just a cavity for machinery.
Temporary solutions for urgent clearance issues
When the clearance is marginal, the first and most decisive move is to force the operator into its highest possible position. A temporary block of hardwood, clamped between the power unit and the ceiling slab, will often deliver the fifty millimetres you need to stop the drive chain from scraping against the concrete. This is not a permanent fix, but it allows the door to cycle while you arrange for a proper solution.
The next stage is a mechanical adjustment in the locking mechanism. A slack chain on an automatic operator will slap against the track guides when the headroom is tight. Follow this sequence to suppress the vibration:
1. Loosen the master link and pull the chain until it is taut against the drive sprocket.
2. Re-tension the chain by shifting the motor base plate forward on its rails.
3. Tighten the bolts and test the carriage for a smooth, even glide.
If the motor still sits perilously close to the ceiling, remove any whip or brackets that are mounted to the top of the rail. These objects eat into your garage door motor height allowance and are rarely essential to the operation. You can often transfer the photo-eye sensor to the wall without altering its safety function, freeing up the space directly above the track. This gets you through the weekend, though a rigorous measurement is still your only true salvation.


0 Comments