
Assessing the Need for Motor Replacement
Common Signs of Motor Failure
An electric motor rarely expires without warning. South African homeowners often mistake early murmurs of failure for quirks. A motor that strains, hesitates, or hums before engaging deserves scrutiny. When the trolley moves but the door stays put, the gear assembly may be beyond repair. In my experience, this is the moment garage door motor replacement diy becomes a practical consideration.
- Grinding or scraping sounds from the powerhead
- The motor runs but the door stays still
- Intermittent operation after repeated attempts
- A burning odour during cycling
Each symptom points to a specific component. Grinding suggests worn gears, while a silent motor may indicate a failed capacitor. Frequent resets of travel limits signal a fading logic board. Recognising these signs early informs whether a repair suffices or garage door motor replacement diy offers a more dependable route.
Quick Diagnostic Tests to Confirm
Before you commit to garage door motor replacement diy, a few quick diagnostic tests will separate a dying motor from a merely sulky one. Disconnect the door from the trolley and run the motor alone. A healthy unit glides through its cycle without complaint. A wheezy, laboured performance tells you the motor itself is failing.
Try these three:
1. Measure the voltage at the motor terminals with a multimeter. Below 215V at the powerhead and your supply is the culprit.
2. Test the capacitor with a capacitance meter. A dead capacitor hums but never turns.
3. Lift the door manually to shoulder height. If it refuses to stay put, the springs are mocking you, not the motor.
When the motor fails every check with theatrical flair, garage door motor replacement diy is no longer a guess. It is a confirmation.
When Replacement Beats Repair
Sometimes a repair feels like the frugal choice, but the maths changes when the motor is old. In South Africa, load shedding adds strain. A motor older than ten years often fails again within months. You pay twice, then pay for replacement anyway.
Compare the quoted repair bill against a new unit. If repair costs exceed half the motor’s price, order new hardware. Also consider the supply chain. A specialist can wait weeks for an obscure part, while a garage door motor replacement diy kit sits on a local shelf.
- Fewer repeat callouts.
- New motor warranties that repairs rarely match.
- Better tolerance for Eskom’s voltage dips.
A full replacement often costs less than two repair visits. When the unit struggles on startup, trust the diagnosis.
Choosing the Perfect Replacement Motor
AC vs. DC Motors – Pros and Cons
Seven out of ten new garage door openers now use DC motors, but that does not make them the right choice for every DIY project. Choosing between AC and DC motors for your garage door motor replacement diy presents a clear choice. DC motors operate quietly and offer soft start and stop, while AC motors bring raw torque and lower upfront cost. I have seen DIYers overlook soft start, which protects the door’s mechanics.
- DC motors: battery backup ready, smoother acceleration, better energy efficiency.
- AC motors: proven reliability, cheaper to source, simpler wiring for older systems.
Now weigh your door’s weight and usage. A heavy timber door may strain a DC motor unless paired with the right drive. Conversely, an AC motor can feel jerky in a home with kids or pets underfoot. Your climate in South Africa also matters. Heat can degrade DC electronics faster than AC’s windings. For a successful garage door motor replacement diy, measure these tradeoffs against your specific conditions.
Calculating the Right Horsepower
A 3.5 metre timber door can silently demand more torque than the spec sheet suggests. I have seen a 0.5 HP motor shudder and halt on a double door that passed the visual test but failed the friction check. Horsepower is not the real question; delivered force at your specific spring tension is.
Measure the door’s lifted weight with the springs engaged. Then add resistance from worn rollers and misaligned tracks. Use this record:
- Door panel width and height in metres.
- Lifting weight measured at the bottom bracket.
- Track friction factor after cleaning and lubrication.
That calculation determines the motor class. A garage door motor replacement diy succeeds when the chosen unit runs at 80% of its rated capacity, not at the edge. South African heat accelerates wire insulation fatigue, so generous headroom protects the system. For a standard double sectional door, 0.75 HP is the practical floor.
Compatibility with Your Garage Door System
Your door has a specific personality. That personality is defined by its shaft size, spring orientation, and track geometry. A garage door motor replacement diy succeeds only when the new motor matches those exact parameters. I always measure the torsion shaft diameter and drum size before ordering anything.
Then assess mounting requirements. The motor bracket must align with your door’s existing reinforcements. Also confirm the power supply. South African installations typically run 220 to 240 volts, but a motor rated for 50 Hz needs to match your grid exactly.
- Check the door’s travel distance.
- Examine the limit switch adjustment range.
- Verify the emergency release handle position.
Compatibility extends to remote controls too. Old receivers often refuse to pair with new transmitters. Ensure the motor’s frequency band matches your existing remotes or budget for replacements. A mismatched unit will humble you quickly!
Smart Features (Wi-Fi, Battery Backup, etc.)
A garage door motor replacement diy becomes more interesting when you consider smart features. Most new motors offer Wi Fi connectivity, letting you monitor door status from your phone. Battery backup is essential for South African loadshedding. A motor with a backup battery keeps functioning during power outages, saving you from being locked out or stuck inside.
What features actually matter? Here is my shortlist:
- Battery backup that runs the motor for 10 to 20 cycles
- Wi Fi with a responsive app for open and close alerts
- Rolling code remotes for better security
- Motion detection lights that activate in the driveway
The emergency release handle must remain accessible. Some motors have a quick release cord, others use a key lock. I always test the release before mounting the motor. A smart motor with a weak release mechanism will frustrate you during loadshedding. I have seen a garage door motor replacement diy turn into a disaster because nobody checked the battery backup capacity first.
Noise Levels and Durability Ratings
A quiet motor makes a garage door motor replacement diy worthwhile. Most homeowners never check the decibel rating until the first 5am departure. Steel reinforced gears and rubber isolation mounts reduce vibration transfer. Durability ratings matter equally. A motor rated for 30,000 cycles will outlast a cheaper unit rated for 10,000. In South Africa, heat and dust accelerate wear. Consider these factors before mounting:
- Noise ratings below 60 decibels for residential areas
- Cycle ratings of 20,000 or more for long term use
- Steel gears instead of nylon for heat resistance
The housing material affects both noise and longevity. Aluminium housings dissipate heat faster, which protects internal components. A garage door motor replacement diy done properly means balancing sound output against expected lifespan, not just picking the cheapest option.
Prepping Your Workspace for the DIY Swap
Essential Tools and Safety Gear
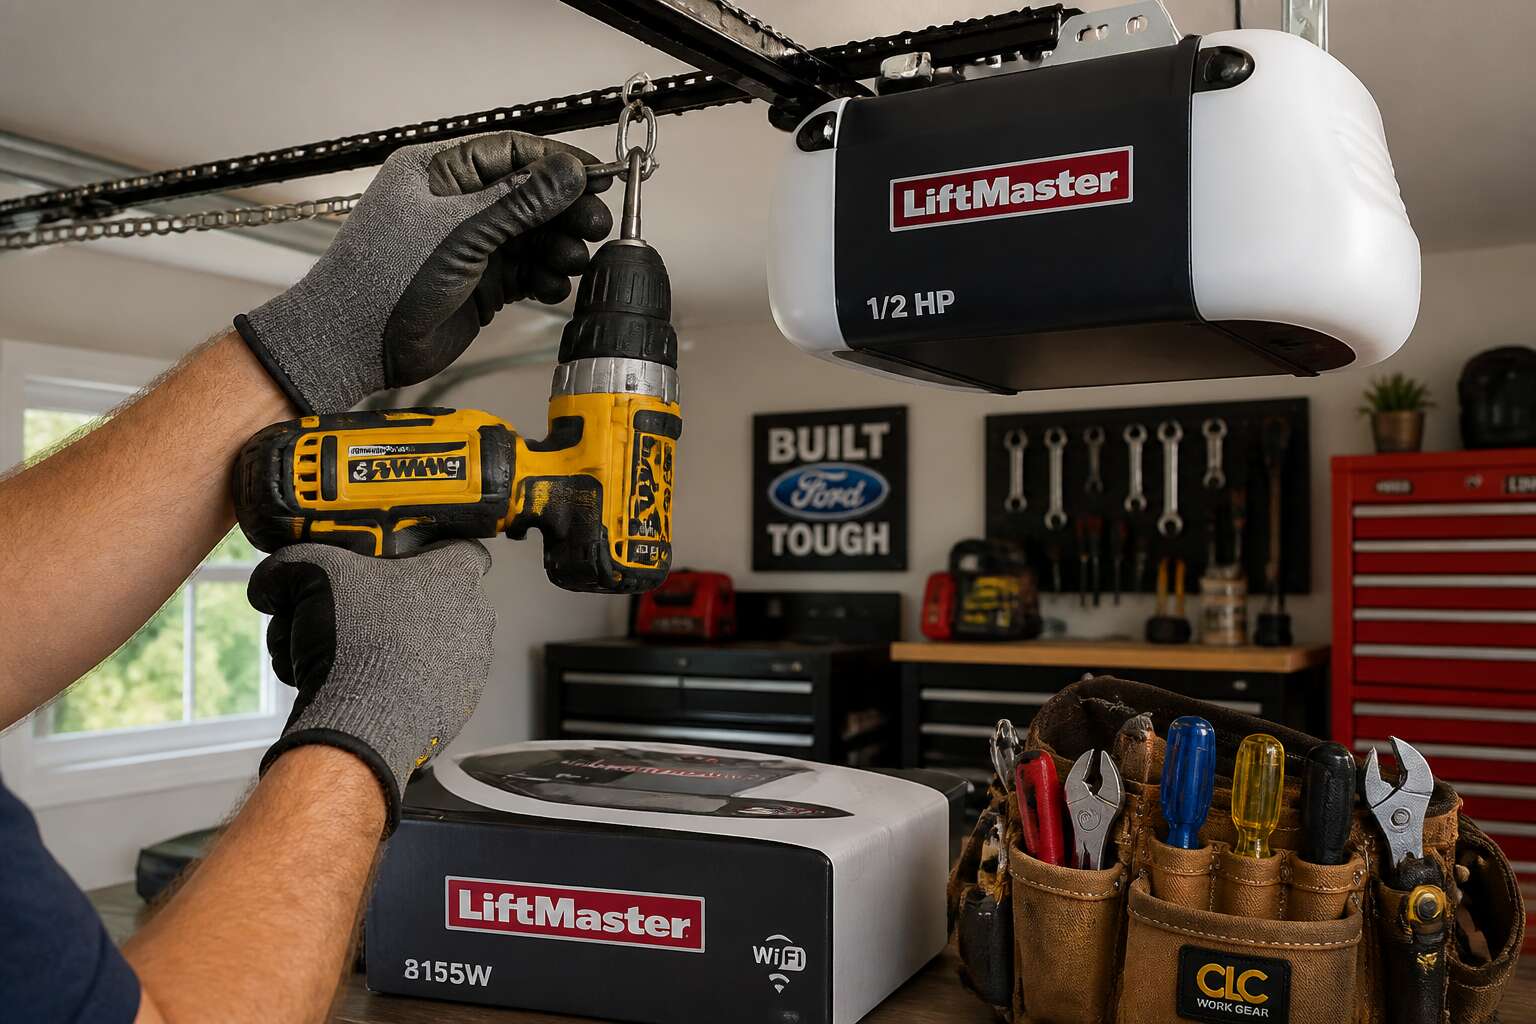
Nothing tests your patience like a stubborn screw at the top of a ladder while holding a ten kilogram motor. The real work of a garage door motor replacement diy project begins before you touch a single wire, and it starts with clearing the chaos around your door. Move the car, the bicycles, and the garden tools. You need a clean, dry, and well lit space to work safely.
Gathering the right gear is the difference between a two hour job and a weekend of frustration. Your old motor is heavy and awkward, so you will need a sturdy step ladder and a second person to help lower it. The tools themselves are simple, but you must have them within reach before you start. Here is the non negotiable kit:
1. A cordless drill with a full battery and a spare.
2. A complete set of sockets and ratchets, metric and standard.
3. A flathead and Phillips screwdriver for the small fasteners.
4. An adjustable wrench for the emergency release rope.
5. A voltage tester to confirm the power is off.
6. A headlamp or work light for the dark corners.
Your safety gear is just as important as the drill bits. Wear leather work gloves to protect your hands from sharp metal edges on the rail system. Use safety glasses because springs and cables store tension and can snap without warning. Most importantly, unplug the motor and disconnect the power at the breaker box. Do not rely on the wall switch being off. The entire garage door motor replacement diy process becomes manageable when you have a clear floor, a charged drill, and a firm grip on the ladder. This preparation saves your back and your nerves.
Cutting Power and Disengaging the Door
Let’s be honest: most garage door motor replacement diy disasters do not happen at the wrong wire. They happen when the floor under the old motor is still carrying bicycles, paint tins, and hope. Move the car out, slide the ladder onto level concrete, and keep the drop zone bare. The old motor comes off exactly once; it will not wait for you to clear the mess.
Cutting power is the part with zero room for creativity! Unplug the motor, then head to the breaker box and kill the circuit. Put a strip of masking tape over the breaker; the label “DO NOT TOUCH” has a proven success rate. Pull the emergency release rope and slide the door a third of the way up. If it moves smoothly, the door is disengaged. If it slams, the springs are still holding tension. Stop. That is where many confident garage door motor replacement diy stories end.
Removing the Old Motor Unit
Clear the workspace before touching the motor. Move the car out, shift the bicycles, and sweep the floor. Dust and loose screws hide under old motors. A clean drop zone makes the garage door motor replacement diy less stressful and keeps tools within reach.
Removing the old motor unit follows a simple order. Unclip the chain or belt from the trolley, then support the motor while you unbolt the brackets. Use a socket set, not pliers, for the mounting nuts. Label each bolt with tape or a marker. A garage door motor replacement diy tests your patience, but labelled parts save you from guessing later.
Lower the motor carefully. It has no handle, so grip the housing from below. Most units weigh between 20 and 30 kilograms. Place it on a sturdy table, not on the car roof. Then inspect the rail and brackets for wear before fitting the replacement.
Inspecting the Torsion Spring and Track
Prepping your workspace for the garage door motor replacement diy begins with lighting. A work lamp aimed at the rail reveals what shadows hide: cracked welds, bent brackets, and the occasional spider that deserves eviction. Position a sturdy step ladder within arm’s reach, but keep it clear of the door’s path.
Inspecting the torsion spring demands caution. Do not touch the spring itself. Look at the coils for gaps or rust, and check the winding cones for loose set screws. The track deserves equal attention. Run a rag along the inside edge to catch burrs. A torch helps here, not a phone flashlight, because you need both hands free.
- Check the track brackets for tight bolts
- Look for dents in the horizontal section
- Confirm the track is level within six millimetres
These checks take five minutes. They prevent the new motor from fighting a misaligned system.
Step-by-Step Motor Installation Guide
Wiring the New Motor – Color Codes and Connections
A single reversed wire turns a ten minute job into a blown circuit board. That is why the wiring step deserves your full attention. In a garage door motor replacement diy, this is where most projects unravel, not at the bracket.
Read the legend on the new motor casing. It shows the exact color code. Standard units use red for live, white for neutral, and green for ground. Some inverters add a blue wire for the capacitor. Match each lead to its counterpart on the wall supply. Use wire nuts rated for the cable gauge. Seal each joint with electrical tape.
- Connect white to white first.
- Hook red to the powered black lead.
- Wrap green around the metal chassis.
After every joint is secure, test the motor before threading it all closed. Listen for a clean hum. No hum means reverse the two hot wires. This step takes two minutes and saves a service call.
Mounting the Motor Bracket Securely
Bolting the bracket into raw brick is a risk. The motor’s vibration loosens weak anchors within weeks. Use masonry anchors rated for at least three times the unit’s weight.
Position the bracket so the rail runs parallel to the door’s centre line. A skew introduces drag on every cycle. Tighten each fastener to torque. Then step back! Perspective reveals what measurement cannot.
I prefer mounting to concrete, never timber. Timber breathes with humidity.
- Mark all hole positions before drilling.
- Drill with a hammer drill, not a percussion drill.
- Blow dust from each hole before inserting anchors.
This sequence curbs the urge to improvise. In a garage door motor replacement diy, the bracket carries everything that follows, patience included.
Attaching the Drive Chain or Belt
Attaching the drive chain or belt turns raw components into a coordinated mechanism. In a garage door motor replacement diy, this step measures your patience. Loop the chain around the motor sprocket and the idler pulley at the rail’s far end. Keep the teeth meshed, never forcing them. A gentle wiggle should seat the links completely.
Check the tension by lifting the chain mid-span. A slack of roughly one centimetre suits most residential units. For a belt, run your thumb along the ribs to confirm every groove aligns with the pulley. Tighten the adjustment bolt gradually, stopping before the rail bends or creaks. Over tension invites premature wear.
Next, align the sprocket with the rail’s centre line. A straight edge reveals any skew that could add drag to each cycle. Then reconnect the trolley to the carriage. Run the motor once without the door engaged, listening for a rhythmic hum. A chatter means the chain or belt needs a half turn more on the tensioner.
Connecting the Rail and Trolley
With the drive assembly tensioned, bring the trolley to the rail. The carriage should slide freely, so wipe the channel and watch for burrs. A garage door motor replacement diy depends on this mating. Align the release cord with the carriage hook, then push until the pin snaps home. Test the engagement lever by pulling the cord.
- Rail segments sit flush
- Limit switches adjust without forcing
- Trolley stops at both ends
Now connect the rail bracket to the motor head. Tighten the carriage bolt, but leave the trolley loose enough for manual release. Run one slow cycle and watch the trolley as it engages the door arm. The rail and trolley must act as one clean unit.
Adjusting Travel Limits and Force Settings
Once the rail and trolley move as one, the motor head waits for its first command. Press the programming button and watch the carriage creep toward the door. Travel limits decide where the journey ends, and force settings decide how firmly the motor refuses resistance. A garage door motor replacement diy succeeds or fails here.
Begin with the close limit, then the open limit. The sequence depends on your brand, but the principle remains constant:
- Set the close limit so the door seals without slamming.
- Adjust the open limit so the door clears the frame completely.
- Recheck force after every limit change.
Turn the screws slowly, a quarter turn at a time. Run a full cycle and listen for strain. Too much force makes the door a hazard. Too little leaves it stalled halfway. This calibration matters for safety. The installation only finishes when the door answers the motor cleanly at both ends.
Testing Safety Reverse and Emergency Release
The silence after a motor fails is a sound every homeowner dreads. For those attempting a garage door motor replacement diy, the true test begins after the new unit rests on its bracket. First, reconnect the power and reengage the trolley. Then run a full cycle, watching for hesitation. The safety reverse demands a block placed in the door’s path; it must halt and retreat without mercy. The emergency release cord should glide free, letting the door drop into manual operation. Verify the rubber sensors align, their beams unbroken. Perform these checks:
- Test the auto reverse with a 40 mm block.
- Pull the release cord and lift the door halfway.
- Ensure the door stays put when released.
Listen for grinding or whirring. The motor should answer instantly. This last step of garage door motor replacement diy decides whether the door serves you or haunts you.
Post-Installation Checks and Common Pitfalls
Calibrating Remote Controls and Keypads
Once the motor settles into its rhythm, the real test begins with calibration. Most DIY installers overlook the remote frequency interference or the keypad’s programming sequence. I once spent an hour chasing a ghost in the system, only to find the keypad needed a reset after a power surge.
- Forgetting to clear old codes from the previous motor
- Placing the keypad near metal brackets that block the signal
- Ignoring the correct frequency setting for the new receiver
Verify each remote responds within a three metre range, then test the keypad’s response from outside. A proper garage door motor replacement diy job ends with every button working flawlessly.
Regular Maintenance for Your New Motor
Once remotes sync and the door glides, the garage door motor replacement diy project still demands a careful audit. Check the chain tension first! A dry chain squeals within weeks, and that noise often masks a slipping sprocket.
Common pitfalls emerge months later. Loose fasteners from vibration, worn isolation brackets, or a failing start capacitor all shorten the motor’s lifespan. Walk through the full open and close cycle twice, listening for grinding. Fix small issues before they become expensive repairs.
- Wipe dust from the motor housing monthly
- Inspect the power cable for cracks or rodent damage
- Test the manual release lever every quarter
Grid power fluctuations stress the motor’s electronics, something South Africans often overlook. The cooling fan should hum quietly, not rattle. A garage door motor replacement diy done right means revisiting the basics: tighten the mounting bolts, clean the rail, and inspect the drive gear for wear.
Troubleshooting Unusual Noises or Fault Codes
Post-installation checks go beyond watching the door glide. Listen for a clunking sound that indicates a misaligned trolley. Verify the emergency release cord hangs with proper slack. Check the motor’s limit switch readings against the door’s physical stops. A garage door motor replacement diy project fails quietly when these details slip.
- Rattling chain means tension is too loose.
- High-pitched whine points to overloaded force settings.
Fault codes displayed on the housing are not random. They map to specific problems like a blocked sensor or a stuck trolley. Address them immediately to avoid burning out the new unit.
0 Comments